
Last weekend I made this bow pillow. I followed a great tutorial online. I really wanted to make a little make up bag with a bow on it, just like the pillow. I changed a lot of the sizes to the bow, but used the same directions. I made a few of them and thought I'd try giving my first sewing tutorial!


Choose two color fabrics. I picked red for my outer pieces and brown for the inside.
Medium weight interfacing
7 inch zipper
Thread and sewing machine

Outer fabric:
2 pieces 8 in. x 5 in.
4 pieces 11 in. x 3 in.
2 pieces 4 in. x 2 in.
2 pieces 3 in. x 2 in.
Inner fabric:
2 pieces 8 in. x 5 in.
Interfacing:
2 pieces 8 in. x 5 in.

Take two of the 11 in. x 3 in. pieces and the 2 x 4 pieces. You will do the same thing to both of them. Sew around all 4 edges, leaving about an inch open.
(Because my fabric is a solid color it doesn't matter what why the fabric is facing. If you use a printed fabric for your outer pieces, you need to make sure to be facing the outside of the fabrics facing each other when sewing the bow pieces.)

Turn your pieces inside out through the holes that you left open.
(If you used a printed fabric, the print side should now be facing out.)
Iron the pieces flat.

Now take your other two 11 in. x 3 in. pieces.
Sew only the long sides together.

Then turn this piece inside out (or outside in - whatever you want to call it! Either way the the fabric side that you want to see should now be facing out.)
Press flat with iron.
You should now have all three pieces to make your bow:


Take your two pieces that were sewn on all edges and fold them in half. Sew down one side of both of them.

Flip these pieces around, so that the sewn part in now on the inside. You now have two loops.

Slide your big loop through your little loop to make your bow.
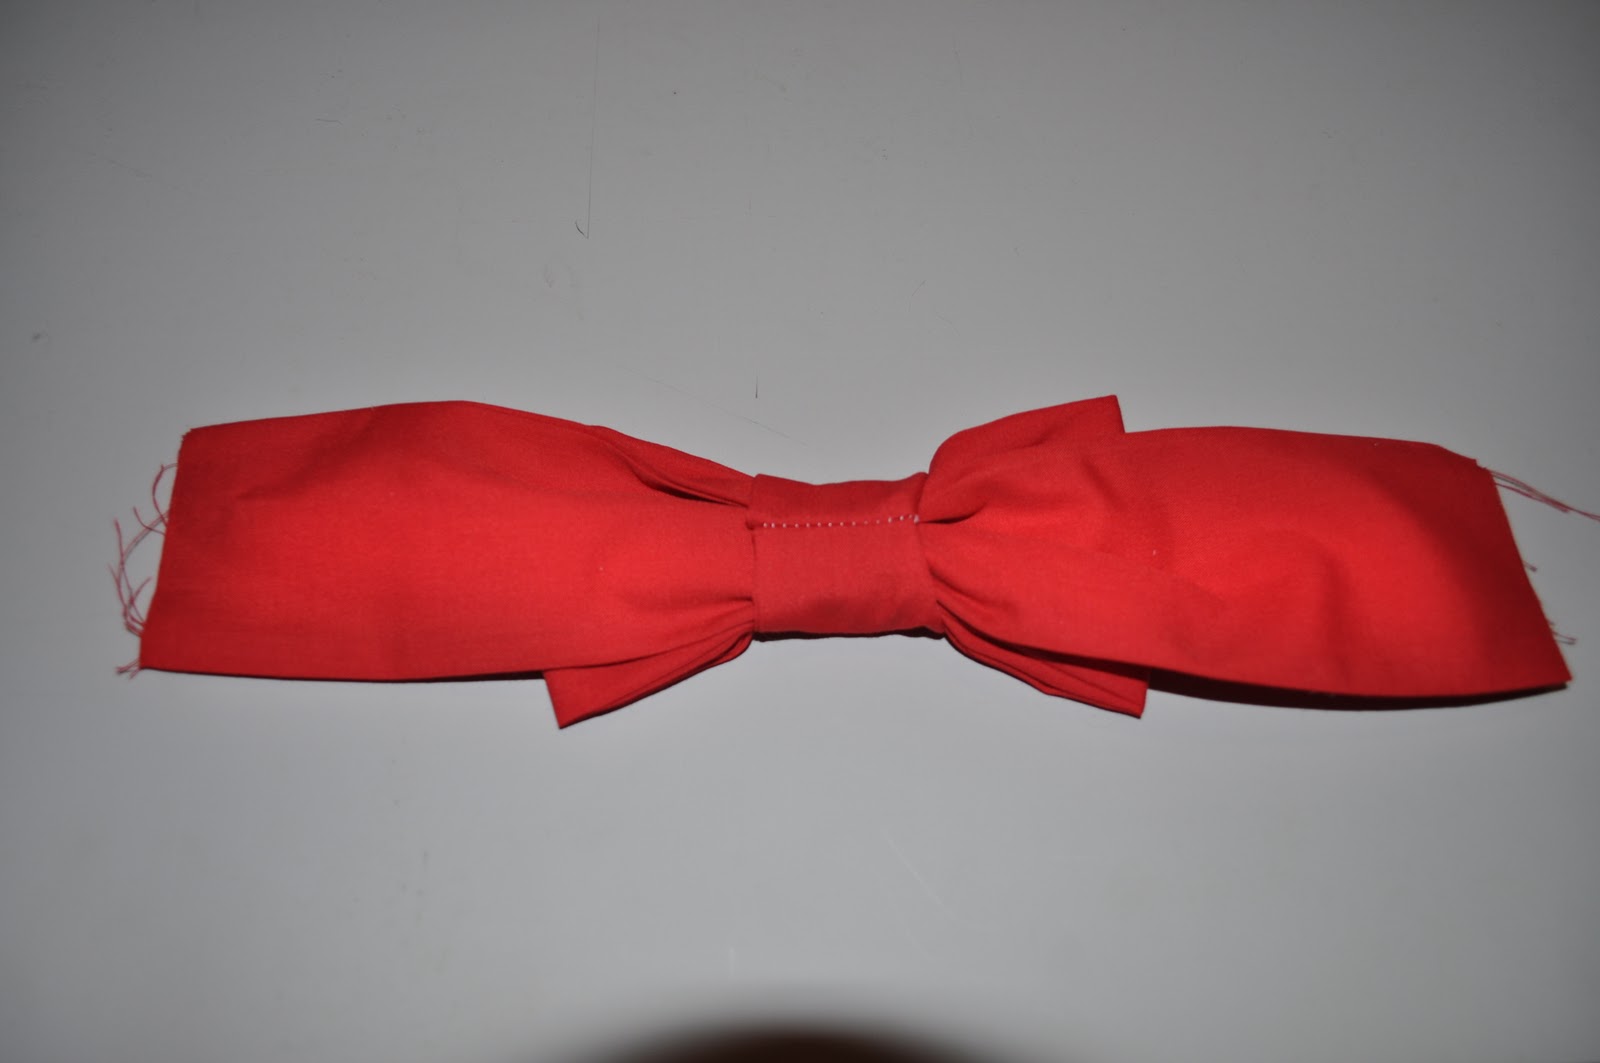 Now take that other long strip and slide it through the back of your bow. Pull it through so your bow is in the middle.
Here's the front view of your bow.

Make your bag
Put your bow on one of the red 8 in. x 5 in. pieces.
Pin it in place and just sew the edges.
Cut off any extra length hanging over.
Get your inner pieces ready.
Iron on the interfacing to the back side of both pieces. (Read the directions on the interfacing.)

Get your zipper ready. Use your two 3 in. by 2 in. pieces. Fold two of the edges in and press down with iron. It should look like this:


Now stack your pieces so you can start sewing your bag together.
Put your outer piece down first. (face up if not solid)
Then your zipper, face down.
Then put your inner piece, face down.

I've messed this part up before, and put my pieces facing the wrong way.
After you pin it some of it together, just check to make sure when you flip it, your pieces with both be facing outward.
Sew your zipper to your fabric.

Flip it around so you have one side of your zipper sewn.

Now sew the other side of your zipper.
Stack your pieces like this:
Other piece of inner fabric facing up.
Zipper piece with inner fabric side facing down.

Finally put your bow piece, facing down.
Sew all the way on the left side to sew the other side of the zipper.
Now you should be able to see how your bag will go together. You will be sewing all the way around on the inner fabric. Straighten your pieces so there are no bunches in your bag. Pin all the way around.
Make sure to unzip your zipper half way. If you don't you will not be able to turn in right side out. I forgot to do this once and had to take out some of the stitching to fix it!

Sew around all three edges. Cut off any extra fabric or thread and flip your bag right side out through your zipper hole.
You are finished!!


I hope I gave clear directions! Let me know if you have any questions.
Don't want to make one yourself?
I've added some of them to my etsy shop: K.Jane

14 comments:
Those are such cute bags :)
Good job! Do you follow Dear Daring on blogger? She posted the other day that she wanted some bloggers to send her diy posts and she'd feature them on her blog...you should send this to her! It would be a great way to expand your reader base and share your amazing skills!
So cute! Great job!
Oh my goodness, girl! HOW cute! You are talented. :)
New follower....I am loving your blog already! Hope you're having a happy weekend! xx
Soo cute, love your blog found you through Hollie's link up.
Tab
my-cliffnotes.blogspot.com
I am SO excited for your tutorial!! Can't wait to pull out my sewing machine and give it a try, I'll have to let you know how it goes!
So cute!! I'm still trying to figure out the sewing thing... most of my projects turn out to be disasters. But I'm trying! Loving your blog. New reader!
They are SO cute! Following you back :)
Annie
The Other Side of Gray
i WAY love this. thanks so much for sharing!
{love} lauryn @ lovenotesbylauryn.blogspot.com
How cute!
Very pretty!
I think I will be trying this!!!
So cute! I love bows, they look so cute on bags!
Super cute! It's taken me a while to get on the "bow" bandwagon, but this just pulled me right on board :)
Post a Comment